After Effects - Keying
- L K
- Apr 25, 2022
- 2 min read

Removing a background using a colour key can take a few different stacked effects to dial in the matte to a good level.
I'll be using the terms green/greenscreen in this post, but the principle is applicable to any colour chroma key.
Having a good clean take on an even as possible green background is essential. Harsh shadows or areas where the subject isn't completely surrounded by green will require rotoscoping.
I have some third party plugins installed, and I'm not certain if all the ones I use below come with stock AfterEffects.

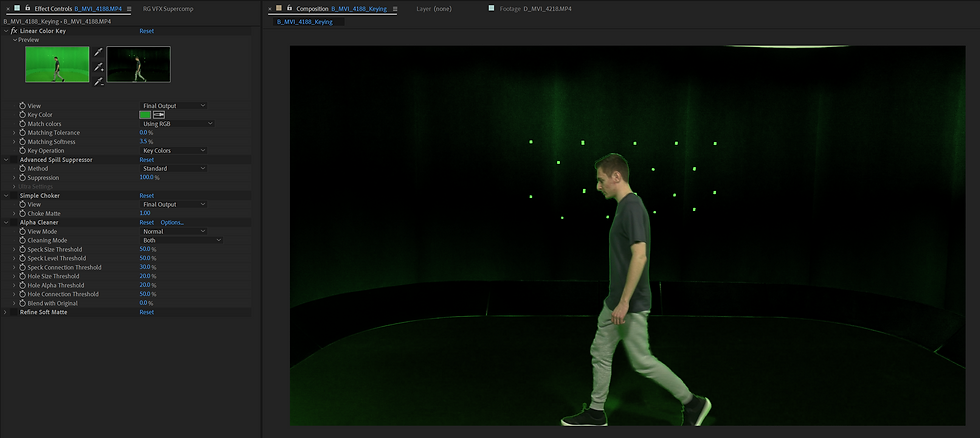


One of the big issues with greenscreens is colour spill. Light areas such as the grey trousers in this footage are highly susceptible to the ambient green light adding an unwanted hue to the whole image.
Spill suppression effects try to counter this by essentially colour keying green out of the RBG hues of the main image. The suppression in this case mutes all the greens in the image to try and counter the spill.
The image to the right shows how it applies to an image if the chroma key is turned off.


The simple choker effect shrinks or expands the edges of a matte in very small increments which can help clean up noise without damaged the main matte. Small specks, the shadows of the greenscreen gaps, some shadowing, are all cleaned up by the simple choker effect.
More information can be found here: https://helpx.adobe.com/after-effects/using/matte-effects.html

This effect was part of a 'Key Correct' plugin by RedGiant. It essentially allows you to remove any parts of the matte that are too small (specks) and to fill any holes in the matte. I used this to remove the tape tracking markers on the wall.
A second colour key on those coloured spots would also clean them up.

This effect is very similar to how the rotobrush effect defines it's edges. It analyses the footage to find areas where the matte is moving between frame to add motion blur to those edges.
There are also more adjustment sliders that can be used to dial in the edge, I explained these sliders in the After Effects rotoscope post.

Masking
The final stage is to mask out any parts of the footage that cannot be keyed.
Inevitably there will be lights, ceilings and other things in the footage that is not green and therefore not affected by a chroma key.
These have to be manually masked out using masks. These masks may have to be manually keyframed if the camera is moving too.


Comments